

Ombre Gradient Nails Ideas: The Ultimate Guide to Stunning Faded Nail Art 2026
If you’ve ever stared at a sunset and thought “I want that on my nails” — ombre gradient nails are exactly what you’ve been dreaming of. This gorgeous nail art technique blends two or more colors seamlessly into each other, creating a soft, faded effect that looks salon-worthy every single time. Ombre gradient nails are endlessly versatile — romantic pinks, moody blues, bold neons, or elegant neutrals — there’s a version for every mood and season. Whether you’re a nail art beginner or a seasoned pro, this complete guide covers the best ideas, techniques, and 2026 trends to make your nails absolutely stunning.
What Are Ombre Gradient Nails?
Ombre gradient nails are a nail art technique where two or more polish colors blend smoothly into one another across the nail surface. The word “ombre” comes from the French word meaning “shaded” — and that’s exactly the effect: a seamless color transition from light to dark, or from one hue to another. This technique can be achieved using a sponge, brush, gel polish, or even nail powder. Unlike traditional single-color manicures, gradient nails add dimension, depth, and artistry to your fingertips. They work on natural nails, acrylics, gel extensions, and press-on nails — making them accessible to absolutely everyone.
Why Ombre Gradient Nails Are a Must-Try Trend in 2026
The ombre nail trend has never been more popular — and in 2026, it’s evolved into something even more breathtaking. Nail artists and beauty lovers are experimenting with multi-color gradients, glitter fades, chrome ombre effects, and even holographic transitions. The technique is incredibly flattering because the color blend draws the eye along the length of the nail, making fingers appear longer and more elegant. It’s also one of the most customizable nail styles in existence — you can match it to any outfit, season, or occasion. Pinterest searches for ombre nail ideas consistently rank among the top beauty searches globally, proving this trend has serious staying power.
Also That: French Manicure Ideas 2026
Best Ombre Gradient Nail Ideas & Inspirations
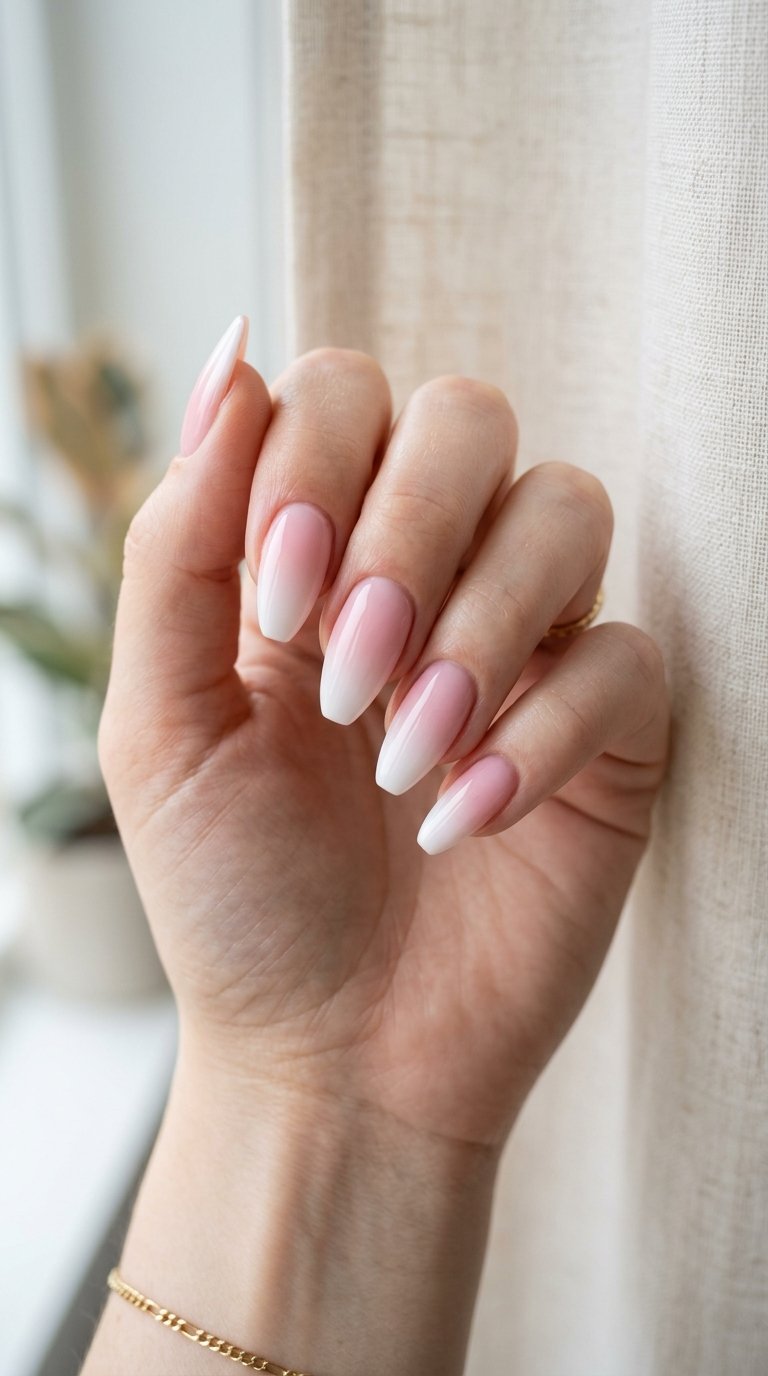
1. Classic Pink to White Ombre
This is the timeless baby boomer nail — a soft blush pink fading into pure white at the tips. It’s elegant, romantic, and effortlessly bridal. The gradient is gentle and subtle, making it perfect for everyday wear, weddings, or formal events. Pair it with a nude or sheer base for an extra polished finish.
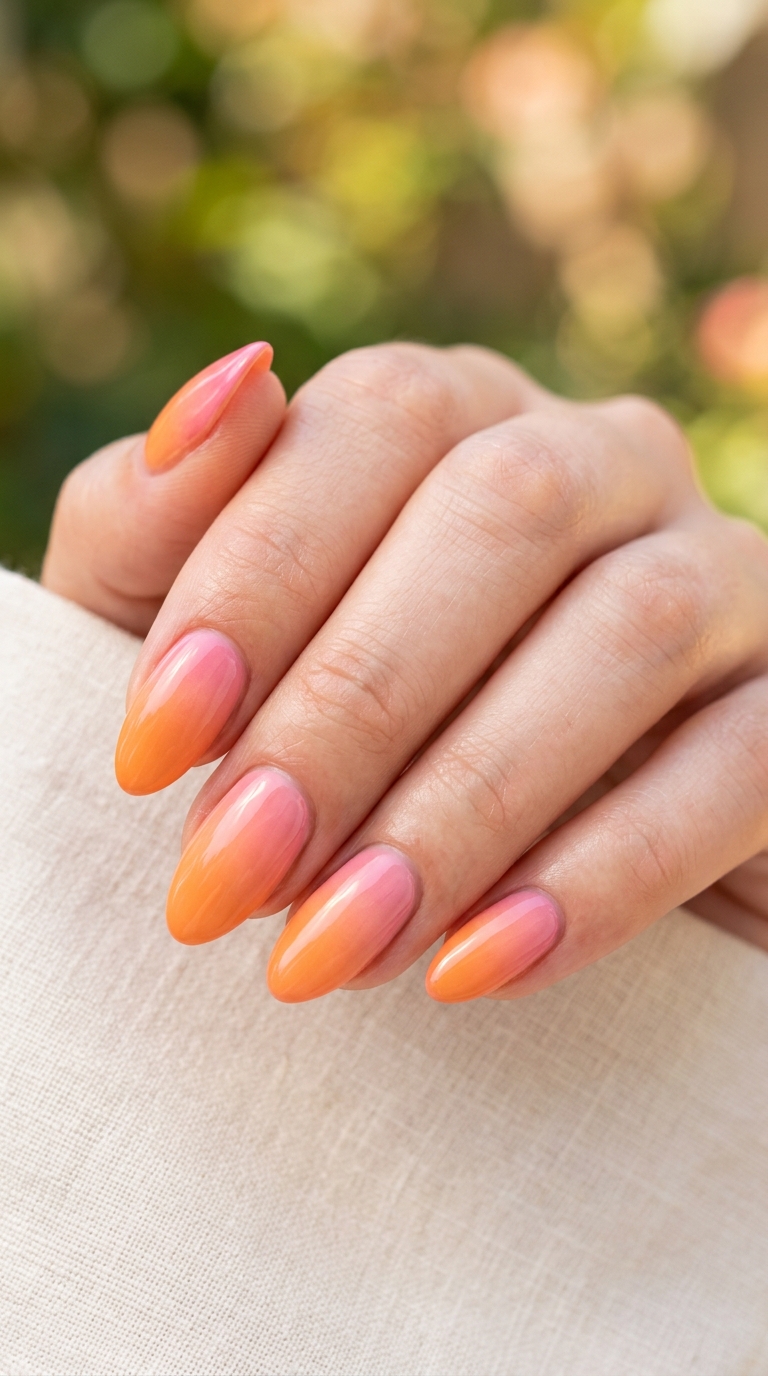
2. Sunset Orange to Pink Gradient
Warm coral orange melting into hot pink creates a stunning sunset-inspired gradient that’s vibrant and eye-catching. This color combo is perfect for summer, festival season, or anytime you want your nails to look like golden hour. Add a touch of gold glitter at the blend point for extra drama.
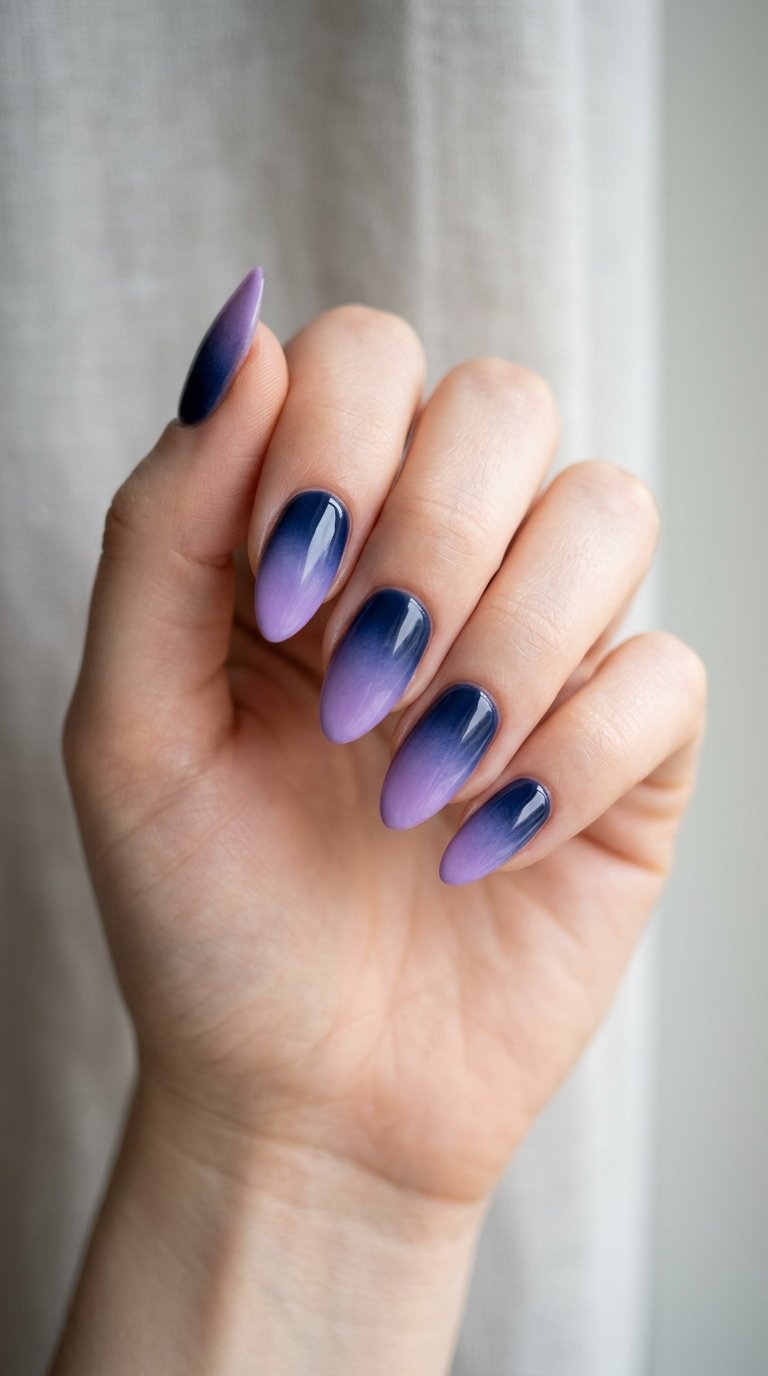
3. Navy Blue to Lavender Fade
Deep navy transitioning into soft lavender is a gorgeous, moody color combination that works beautifully for fall and winter. It feels luxurious and artistic — like a twilight sky captured on your fingertips. This look pairs perfectly with silver jewelry and cool-toned outfits.
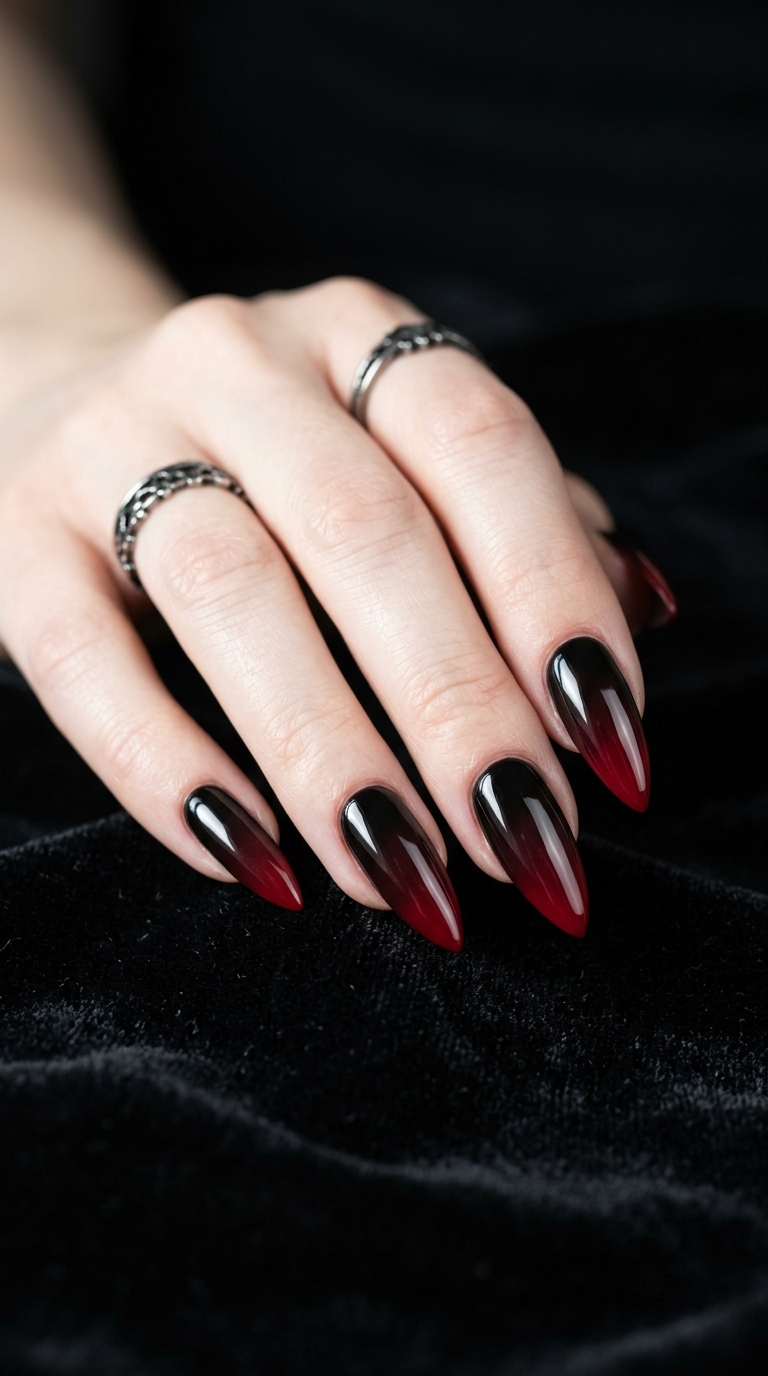
4. Black to Deep Red Gothic Ombre
A dramatic black-to-burgundy or black-to-red gradient is the ultimate edgy, bold nail moment. This dark ombre nail idea is brooding, fierce, and incredibly trendy for gothic, dark academia, or maximalist aesthetics. It looks stunning on long almond or coffin-shaped nails with a glossy topcoat finish.
How to Do Ombre Gradient Nails at Home
Step 1: Gather Your Supplies
You’ll need two or more nail polish shades, a makeup sponge (the key tool for blending), a base coat, topcoat, nail tape or liquid latex, and nail polish remover for cleanup. Gel ombre requires gel polishes and a UV/LED lamp. Having everything laid out before you start makes the process smooth and mess-free.
Step 2: Apply Base Coat & First Color
Start with a clear base coat on all nails and let it dry completely. Then apply one to two coats of your lightest chosen color as the base. This gives the gradient a clean, even foundation to build on and prevents staining of the natural nail.
Step 3: Paint & Sponge the Gradient
Paint both colors side by side directly onto your makeup sponge, slightly overlapping in the center where you want the blend. Dab — don’t drag — the sponge onto your nail repeatedly, building up the color in light layers. The dabbing motion is what creates that seamless, professional-looking fade effect.
Step 4: Clean Up & Seal
Use a small brush dipped in nail polish remover to clean up the edges and cuticle area. Once happy with the gradient, apply two thin layers of glossy topcoat to seal the design, smooth out texture from the sponge, and add lasting shine. Your stunning ombre nails are ready.
Best Color Combinations for Gradient Nails
Choosing the right color pairing makes all the difference between a good and a gorgeous ombre nail look. Colors that sit next to each other on the color wheel — like blue and purple, or pink and orange — blend the most naturally and create the smoothest gradients. Contrasting complementary colors like black and gold or white and teal create dramatic, high-impact looks. For beginners, starting with shades in the same color family (like two pinks or two blues) is the easiest way to achieve a clean, effortless blend. Neutral-to-glitter combinations are the most forgiving and consistently look polished.
Ombre Nail Styling Tips & Best Practices
Tip 1: Use Thin Layers Build the gradient slowly with multiple thin layers rather than one thick application. Thin layers blend more smoothly, dry faster, and create a more professional, even finish without clumping or streaking.
Tip 2: Work Quickly Nail polish dries fast — work quickly when applying colors to the sponge so the blend point stays wet and workable. If it dries on the sponge before you dab it on, the gradient will look patchy and uneven.
Tip 3: Use Liquid Latex Around Cuticles Painting liquid latex or peel-off base coat around your cuticles before starting means cleanup takes seconds — just peel it away to reveal clean edges. This saves enormous time and keeps the process stress-free.
Tip 4: Finish with Glossy Topcoat A high-shine topcoat is essential — it smooths out any texture left by the sponge and gives the gradient a glass-like, salon-quality finish. Reapply topcoat every 2–3 days to extend the life of your manicure.
Tip 5: Try Gel for Longevity If you want your ombre nails to last 2–3 weeks without chipping, gel polish is the best investment. Gel ombre nails are applied in thin layers cured under a UV lamp, resulting in a flawless, long-lasting gradient finish.
Common Ombre Nail Mistakes to Avoid
Mistake 1: Using Colors That Are Too Similar in Tone If both colors are too light or too close in shade, the gradient becomes invisible and the blend effect is lost. Always ensure there’s enough contrast between your two chosen colors for the fade to actually show up and make an impact.
Mistake 2: Dragging Instead of Dabbing Dragging the sponge across the nail smears the colors rather than blending them. The dabbing motion — pressing and lifting repeatedly — is the only technique that creates that signature smooth, seamless gradient look.
Mistake 3: Skipping the Base Coat Skipping base coat leads to nail staining, especially with dark or pigmented gradient colors. It also causes the polish to peel faster. A base coat is non-negotiable for both nail health and manicure longevity.
Mistake 4: Applying Too Much Product at Once Loading up the sponge with thick globs of polish creates a messy, textured result. Less is more — apply a thin, even strip of color to the sponge and build the gradient gradually for the cleanest result.
Mistake 5: Not Sealing with Topcoat Ombre nails without topcoat look matte, textured, and unfinished — and they chip within days. A good topcoat transforms the look, locks in the gradient, and gives your nails the glossy, professional finish they deserve.
FAQs
Q: What are ombre gradient nails? They’re a nail art style where two or more colors blend seamlessly into each other, creating a soft faded or shaded effect across the nail.
Q: Can beginners do ombre nails at home? Yes — the sponge technique is beginner-friendly. Start with similar shades in the same color family for the easiest, most forgiving blend.
Q: How long do ombre nails last? Regular polish ombre lasts about 5–7 days; gel ombre nails can last 2–3 weeks with proper topcoat maintenance.
Q: What nail shapes work best for ombre nails? Almond, coffin, and oval shapes showcase the gradient beautifully, but ombre works on every nail shape including short square nails.
Q: What’s the difference between ombre and gradient nails? They refer to the same technique — ombre is the French term for shading, while gradient describes the color transition. Both mean the same thing in nail art.
Q: Do I need special tools for ombre nails? A basic makeup sponge is the main tool needed. Gel ombre requires gel polish and a UV/LED lamp for curing.
Q: What are the trendiest ombre nail colors for 2026? Chrome metallic fades, pastel rainbow gradients, nude-to-glitter blends, and deep moody two-tone gradients are dominating 2026 nail trends.
Conclusion
Ombre gradient nails are the perfect fusion of art, elegance, and self-expression — and 2026 has never had more stunning options to explore. Whether you love soft romantic pastels or bold dramatic fades, there’s a gradient nail look made exactly for you. Grab your sponge, pick your colors, and let your nails do the talking. Save this guide, try a new look this week, and make every manicure a masterpiece.