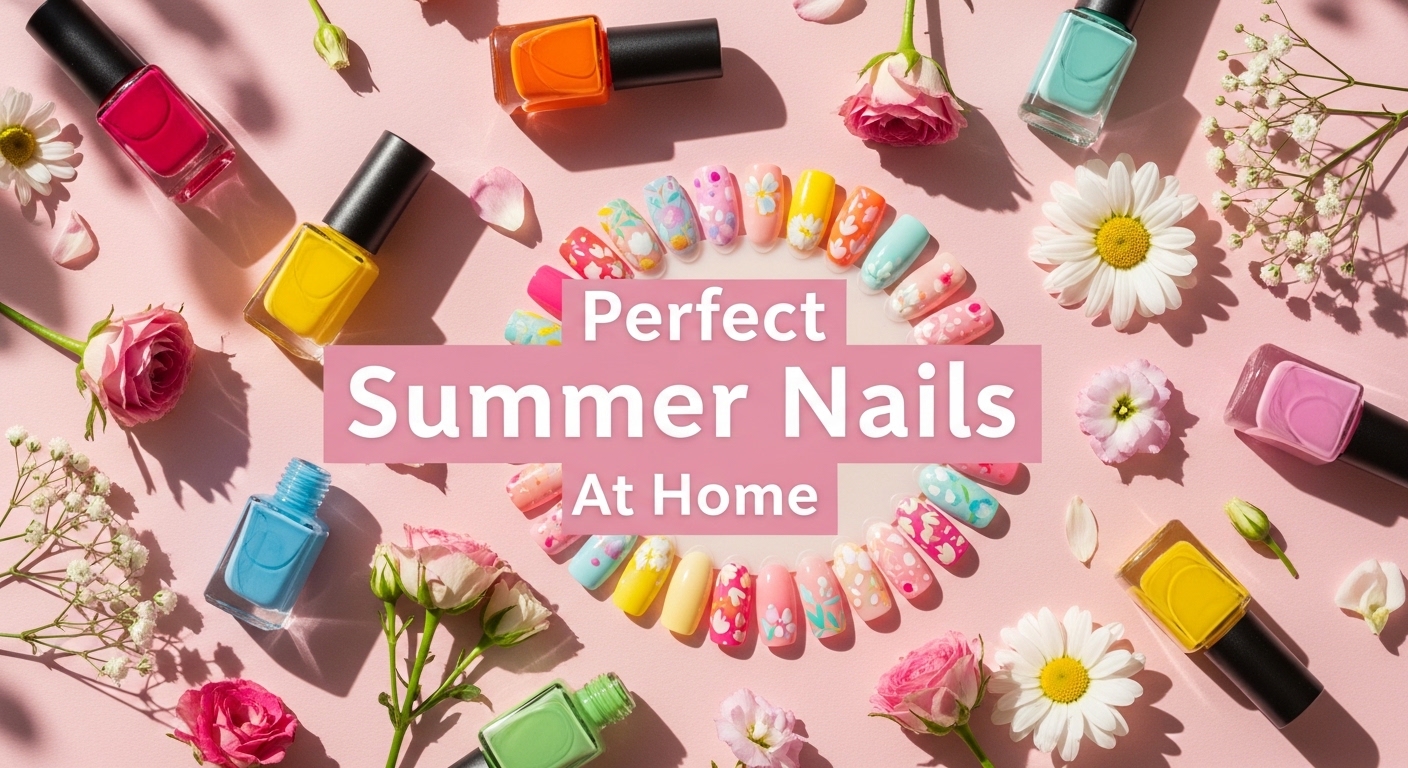
How To Get Perfect Summer Nails At Home Step By Step
There is something about summer that makes you want your nails to look absolutely perfect bright, fresh, polished, and completely put-together. Whether you are heading to a rooftop party, a beach vacation, a backyard barbecue, or just living your best summer life, summer nails are one of the easiest and most satisfying ways to elevate your entire look without spending a fortune at the salon.
The problem most people run into is that home manicures never seem to look quite as good as professional ones. The polish goes on streaky, the edges are messy, it chips within two days, and the whole thing feels like a waste of time and effort. Sound familiar? The good news is that the gap between salon-quality nails and home manicure results has almost nothing to do with talent — it has everything to do with technique, preparation, and using the right products in the right order.
In this complete step-by-step guide, you will learn exactly how to get perfect summer nails at home — from proper nail prep and shaping to base coat application, color selection, top coat finishing, and long-lasting care. We cover the best summer nail colors for 2025, trending nail art ideas you can actually do yourself, the tools you genuinely need, the mistakes that ruin most home manicures, and how to make your polish last for two weeks without chipping.
By the time you finish reading, you will have everything you need to give yourself a genuinely professional-quality summer manicure at home — and you will never overpay at a nail salon for something you can do better yourself.
Why Home Summer Nail Care Is Worth Mastering
The average American woman spends between $600 and $1,200 per year on professional nail services. A gel manicure at a salon typically costs $35–$65 before tip, and most people get one every two to three weeks during summer months when nail visibility is at its highest. Learning to do your own nails at home with professional-level results can realistically save you $400–$800 annually — while also giving you the freedom to change your color whenever you want, experiment with nail art, and maintain your nails on your own schedule.
Beyond the financial benefit, home nail care gives you complete control over the products touching your skin and nails. Many budget nail salons use lower-quality products, reuse tools without proper sterilization, and apply treatments too aggressively — leading to nail damage, thinning, and infections over time. Doing your nails at home with quality products and proper technique is genuinely better for your nail health in the long run.
Summer specifically presents unique nail challenges that make proper technique even more important. Sun exposure, saltwater, chlorine, frequent hand washing, and the general activity level of summer all accelerate polish chipping and nail damage. A properly applied home manicure using the right preparation and finishing techniques can genuinely outlast a rushed salon appointment.
Everything You Need Before You Start The Complete Summer Nail Tool Kit
Before learning the step-by-step technique, you need the right tools. The most common reason home manicures fail is not poor technique it is missing tools that force shortcuts in critical steps. Here is exactly what you need:
Essential Nail Tools
Nail file and buffer set: A glass nail file (rather than a cheap emery board) creates a smoother edge that chips less and causes less nail damage. A four-sided buffer block — rough grit for smoothing ridges, medium for shaping, fine for polishing, and ultra-fine for shining — gives you complete nail surface control. OPI, Kiss, and Revlon all make excellent affordable buffer sets available at Target, Walmart, and Amazon for $5–$15.
Cuticle pusher and cuticle nipper: A metal or rubber-tipped cuticle pusher gently moves back overgrown cuticles without cutting. A sharp cuticle nipper (small scissors-like tool) removes only the dead skin that has lifted away from the nail — never cut live cuticle tissue. Tweezerman makes the gold standard professional-quality cuticle tools available at Ulta, Target, and Amazon for $10–$25.
Nail soaking bowl: A small bowl of warm water with a few drops of cuticle oil or a tiny amount of dish soap softens cuticles and loosens any debris around the nail edge before cleaning. A regular small mixing bowl from your kitchen works perfectly — no special purchase required.
Orange wood sticks: These inexpensive wooden sticks (available in bulk on Amazon for $3–$5 per pack of 100) are used for pushing back cuticles gently, cleaning under nail edges, and fixing small polish mistakes before they dry. Every professional manicurist uses them constantly.
Lint-free nail wipes or cotton pads: Regular cotton balls leave fibers on the nail surface that contaminate your polish and prevent adhesion. Lint-free wipes available at Sally Beauty, Amazon, and nail supply stores create a clean, fiber-free nail surface before polish application. This single tool upgrade makes a significant difference in polish quality.
Nail brush for cleaning: A small stiff-bristled nail brush (like a toothbrush-style tool) scrubs the undersides and edges of nails clean before your manicure begins.
Also Read: Simple Summer Nails That Look Expensive And Elegant
Essential Nail Products
Nail polish remover (acetone-based for gel or glitter, non-acetone for regular polish): Acetone removes polish completely and efficiently but is drying with frequent use. Non-acetone remover is gentler but works more slowly. For summer manicures, keep both on hand — acetone for complete removal before a fresh manicure, non-acetone for touch-up work.
Cuticle oil: The single most underused nail product in home manicures. Regular cuticle oil application (jojoba oil, vitamin E oil, or dedicated cuticle oils from brands like CND Solar Oil or OPI Nail & Cuticle Oil) keeps the skin around nails flexible, healthy, and prevents the dry, raggedy cuticle appearance that makes even a good manicure look unkempt. Apply it every single night before bed during summer months.
Base coat: Non-negotiable for long-lasting color. Base coat creates a sticky, even surface for polish to adhere to, prevents staining of natural nails from dark or pigmented colors, and adds a layer of protection for the nail itself. Orly Bonder, OPI Natural Nail Base Coat, and Essie Here to Stay are all excellent options in the $8–$12 range.
Nail polish: Your color of choice — covered in depth in the summer color section below.
Top coat: The finish coat that seals and protects your color. Seche Vite Dry Fast Top Coat and OPI Infinite Shine Top Coat are the most consistently recommended for chip resistance and high-gloss finish. Reapplying top coat every two to three days dramatically extends your manicure life.
Nail polish corrector pen or small detail brush with acetone: For cleaning up edges and fixing small mistakes without restarting. The Remover Pen from Sally Hansen costs about $6 and is genuinely one of the most useful tools in a home manicure kit.
How To Get Perfect Summer Nails At Home
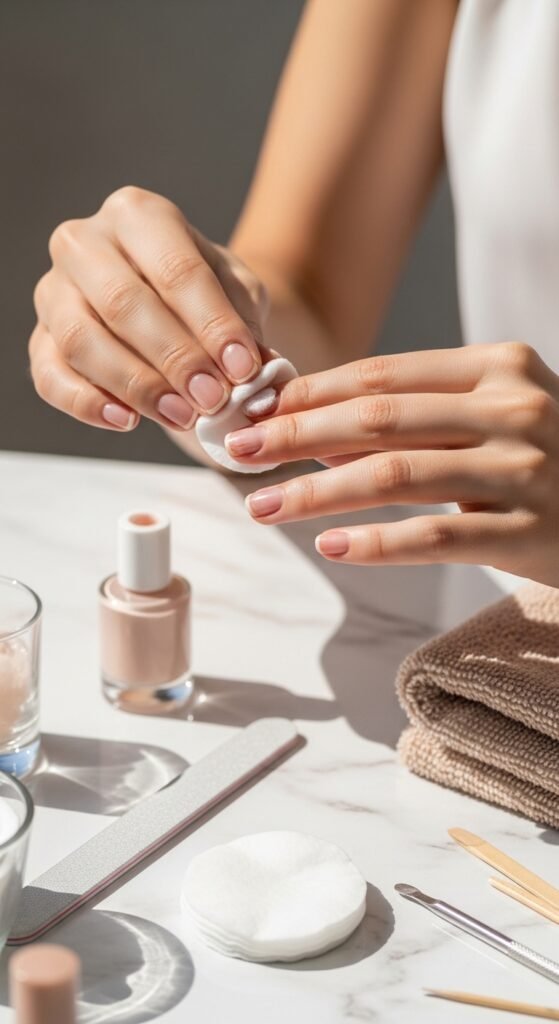
Step 1 — Remove All Old Polish Completely
The foundation of a perfect manicure is a completely clean starting surface. Even if your nails look polish-free, residual oils, old polish traces, and product buildup affect how new polish adheres and lasts.
Saturate a lint-free wipe with nail polish remover and press it against each nail for 5–10 seconds before wiping — this soaking action dissolves polish more efficiently than immediately wiping and reduces the scrubbing required. Use one wipe per hand rather than one per nail to avoid reapplying dissolved polish from a saturated wipe back onto clean nails.
For glitter polish or dark pigmented colors, use acetone-soaked cotton pressed against the nail and wrapped in a small square of aluminum foil for 3–5 minutes. This foil wrap method dissolves stubborn polish completely without aggressive scrubbing that damages the nail surface.
After removing all polish, wash your hands thoroughly with soap and water, then scrub nails with the nail brush to remove all residue. Dry completely.
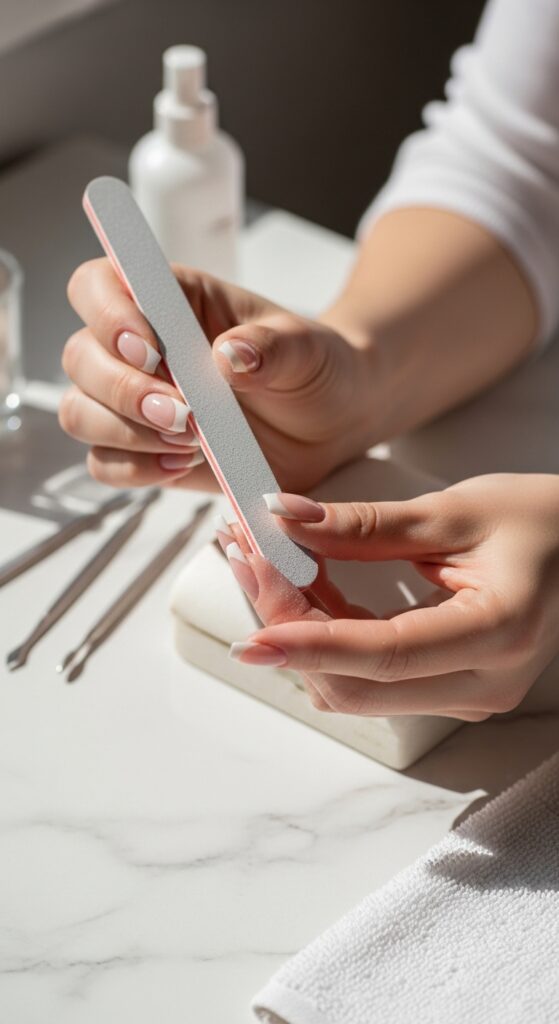
Step 2 — Shape Your Nails
Nail shape is one of the most underrated elements of a summer manicure. The right shape for your nail length and finger shape can make hands look longer, slimmer, and more elegant — while the wrong shape creates a stubby or awkward appearance regardless of how beautiful the polish color is.
Popular nail shapes for summer 2025:
Square: Clean, flat tip with sharp corners — classic, bold, works best on longer nails. Very popular for French manicures and minimalist single-color summer looks.
Rounded: Similar to square but with softened corners — the most flattering and low-maintenance shape, ideal for shorter nails. Looks elegant without requiring significant length.
Oval: Narrowed sides that taper to a rounded tip — creates the illusion of longer, slimmer fingers. The most popular nail shape for summer nail art and elevated manicure looks.
Almond: More dramatically tapered sides than oval with a softer point — elegant, feminine, and very popular for summer nail art. Requires moderate nail length.
Coffin/Ballerina: Long, tapered with a flat tip — the most dramatic shape, requires significant length or acrylic/gel extensions. Very popular for bold summer nail looks.
Squoval: The hybrid between square and oval — flat tip with slightly rounded corners. The most universally flattering shape for everyday wear.
How to file correctly: Always file in one direction — from the outer edge toward the center tip. Back-and-forth sawing motion creates micro-tears in the nail edge that cause splitting and peeling. Use a glass nail file for the smoothest, most chip-resistant edge. File dry nails — never file nails that have just been soaked or washed, as wet nails are more prone to damage.
Step 3 — Soak and Prep Your Cuticles
Properly prepared cuticles are the difference between a manicure that looks professional and one that looks homemade. This step takes five minutes but creates a dramatically cleaner, more polished final appearance.
Fill a small bowl with warm (not hot) water. Add 3–4 drops of cuticle oil, one drop of gentle dish soap, or a cuticle-softening tablet. Soak your fingertips for 3–5 minutes. The warm water softens the cuticle skin, making it pliable and easy to push back without tearing or pain.
After soaking, dry your hands gently. Take your rubber-tipped or metal cuticle pusher and very gently push the softened cuticle skin back toward the base of the nail in small circular motions. You are not forcing — you are simply guiding the softened skin back to reveal more of the nail plate. This creates a cleaner, longer-looking nail surface for polish application.
Use your cuticle nipper only on the small pieces of dead, lifted skin (hangnails and loose cuticle pieces) that have separated from the nail. Never cut into the live cuticle — this causes pain, bleeding, and removes the protective barrier that keeps bacteria away from the nail root.
Use an orange wood stick wrapped in a tiny piece of cotton or just the tip alone to gently clean under the free edge of each nail, removing any debris that the brush missed.

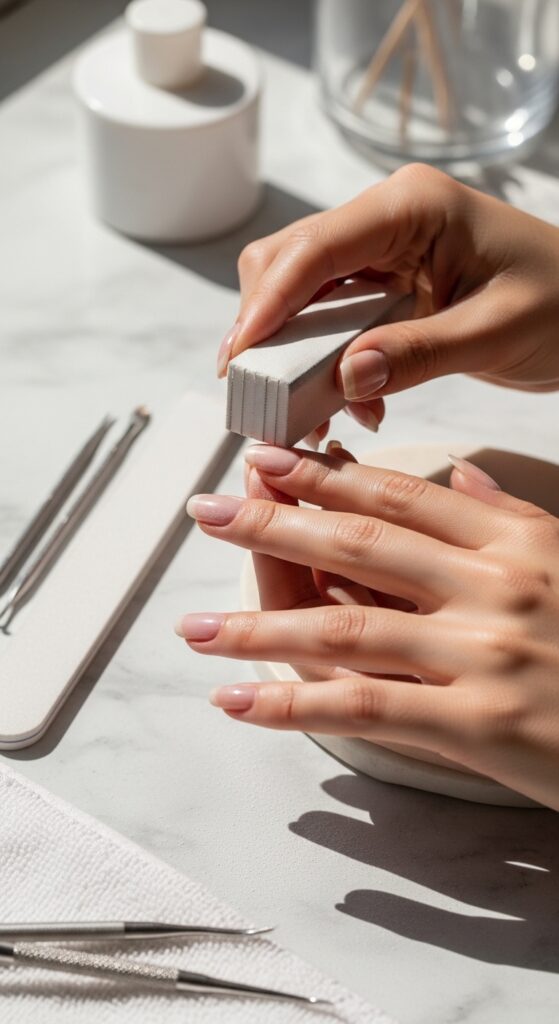
Step 4 — Buff and Smooth the Nail Surface
After cuticle prep, use your buffer block to create a perfectly smooth nail surface. This step addresses ridges, shine, and any remaining texture that would show through polish.
Four-sided buffer sequence:
- Rough grit side: Gently buff over the nail surface to smooth any ridges or bumps. Use light pressure and work in small circular motions.
- Medium grit side: Continue smoothing and begin to remove the scratch marks from the rough grit.
- Fine grit side: Creates an even, matte surface ready for base coat adhesion.
- Ultra-fine/shining side: Optional — creates a natural shine if you want a no-polish buffed look, or skip this side if applying color.
Important: Do not over-buff. Excessive buffing thins the nail plate over time. Light, gentle pressure is all that is needed — you are smoothing, not sanding. If your nails are already smooth and ridge-free, skip to the fine grit side only.
After buffing, remove all dust with a clean dry brush or by blowing gently on each nail. Then wipe each nail with a lint-free pad dampened slightly with a small amount of acetone or 91% isopropyl alcohol. This final dehydration step removes all oils and residue from the nail surface — and it is one of the most critical steps for polish longevity that most people skip entirely. Oil on the nail surface prevents polish adhesion and is the primary cause of premature peeling.
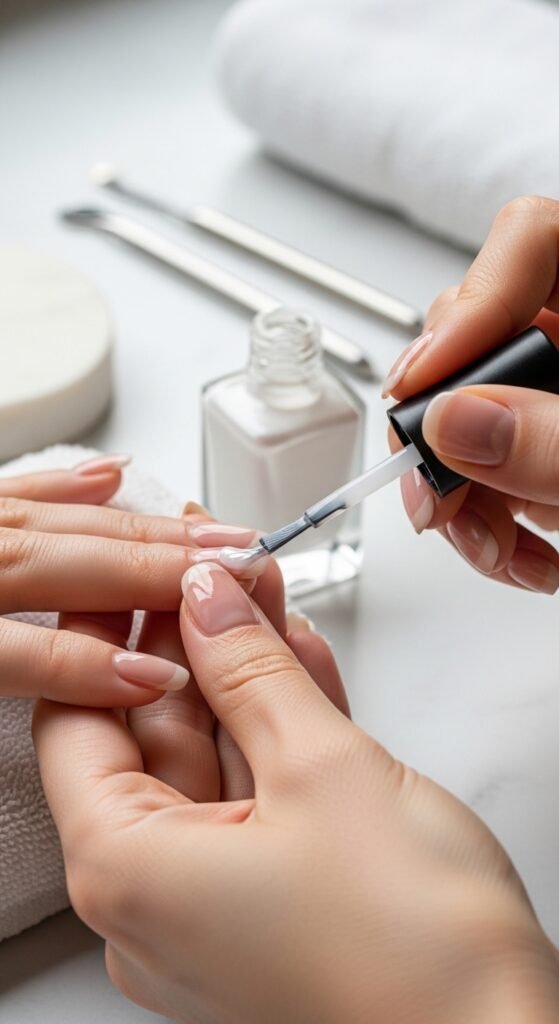
Step 5 — Apply Base Coat
Base coat is the foundation that everything else depends on. Never skip it — not even once, not even for a light color that “probably won’t stain.” Base coat does four important things: it creates a slightly tacky surface that polish adheres to more strongly, it prevents pigmented polishes from staining your natural nail yellow or orange, it adds a thin protective layer to the nail itself, and it fills in any remaining minor surface imperfections.
How to apply base coat correctly:
Wipe the brush on the inside neck of the bottle to remove excess product — you want a thin, lightly loaded brush, not a glob of product. Apply three strokes per nail: one down the center from cuticle to tip, one stroke down the left side, one stroke down the right side. This three-stroke method covers the nail completely and efficiently.
Cap the free edge: After the three strokes, drag the brush lightly across the very tip of the nail (the free edge). This seals the edge and prevents water and product from getting underneath the polish layers — which is one of the main causes of chipping and lifting.
Apply one thin layer of base coat to all ten nails. Allow it to dry for 90 seconds to 2 minutes before applying color. It should feel dry to light touch but still slightly tacky — this tackiness is what makes your color adhere.
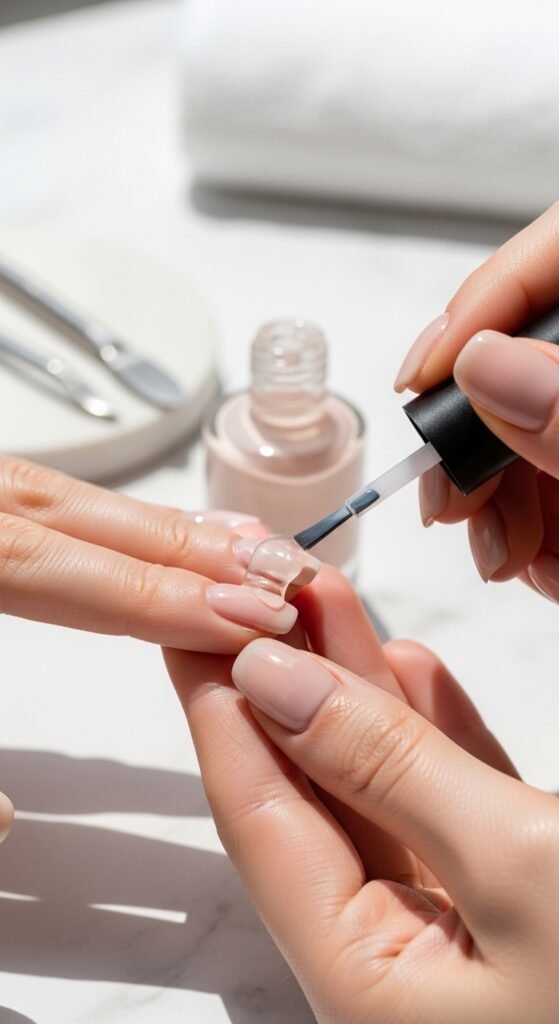
Step 6 — Apply Your Summer Nail Color
This is the step most people rush — and rushing color application is the primary reason home manicures look uneven and amateurish. The professional secret is thin coats, patience between layers, and a confident stroke technique.
The professional three-stroke technique:
Load the brush with polish by dipping it in and wiping one side against the bottle neck — you want the brush loaded on one side, clean on the other. Place the loaded brush 1–2mm away from the cuticle (never touching the skin), and press it down gently so the bristles fan out slightly. Drag it toward the tip in one smooth, confident stroke. Repeat this with one stroke down the left side and one down the right.
Apply two thin coats — always, regardless of color.
First coat: Apply thin enough that you can almost see through it. This coat may look streaky and uneven — that is completely normal and expected. Do not try to fix it by adding more product. Allow it to dry for 2–3 minutes until it feels completely dry to the touch and has lost its wet shine.
Second coat: Apply in the same three-stroke method. This coat should fully opaque the color and cover any streakiness from the first coat. If your polish is extremely sheer or buildable, a third coat is appropriate — but it must be equally thin.
Cap the free edge after each color coat: This is non-negotiable. Drag the brush across the tip of each nail after the three main strokes. This creates a sealed edge that prevents tip chipping — the most common form of manicure failure.
Allow the second coat to dry for 3–4 minutes before moving to top coat.
Cleaning up edges during color application: Have your orange wood stick wrapped with a tiny piece of cotton or your corrector pen ready. While your color coats are still wet (within 30 seconds of application), use the stick to gently remove any polish that touched the skin around the nail. Working while wet is far easier and cleaner than trying to remove dried polish later.

Step 7 — Apply Top Coat
Top coat is where a good manicure becomes a great manicure. It seals in your color, adds the shine level you want (high-gloss, satin, or matte), and creates a hard protective layer that resists chipping dramatically.
Apply your top coat using the same three-stroke method as your color. One thin, complete coat over each nail, capping the free edge thoroughly. Top coat should be slightly thicker than color polish — a single generous coat is appropriate.
Top coat types and their results:
High-gloss top coat (Seche Vite, OPI Infinite Shine): Creates a mirror-like shine that looks like a gel manicure. Best for summer nail looks where vibrancy and gloss are the goal.
Quick-dry top coat: Reduces drying time but sometimes at the expense of durability. Seche Vite is unique in that it is both quick-dry AND extremely durable — it is the most recommended top coat by nail enthusiasts and professionals for this reason.
Matte top coat: Transforms any glossy polish into a flat, velvety matte finish. Trending enormously for summer 2025 — a matte top coat over bright summer colors creates a sophisticated, editorial look. Essie Matte About You and OPI Matte Top Coat are the most popular options.
Gel-effect top coat: Creates a gel-like thick, dome-shaped shine without UV lamps. Sally Hansen Miracle Gel Top Coat is the most accessible option at Target and Walmart.
After applying top coat, allow your nails to dry for at least 10 minutes before any activity. For complete hardness, nails need approximately 1–2 hours to fully cure even when they feel dry to the touch.
Step 8 — Apply Cuticle Oil and Final Cleanup
The last step is also one of the most important for both appearance and nail health. Apply one drop of cuticle oil to each cuticle and gently massage it in, allowing it to penetrate the skin around the nail. This adds an instant healthy glow to the skin around your manicure and hydrates the cuticle to prevent dryness and peeling.
CND Solar Oil, OPI Nail & Cuticle Oil, and the Lemon Cuticle Oil from Sally Hansen are all excellent options in the $8–$15 range. For an extremely budget-friendly alternative, pure jojoba oil or vitamin E oil from Amazon or Walmart works equally well at a fraction of the dedicated product cost.
After the oil has absorbed for a minute, do a final cleanup check — look at each nail in good light for any skin touching the polish, any bubbles, any uneven edges. Use your corrector pen or an orange wood stick dipped in acetone for any final touch-ups.

The Best Summer Nail Colors for 2025 — Complete Trend Guide
Choosing the right summer nail color is one of the most enjoyable parts of the entire process. Here is a complete guide to what is trending, what is timeless, and what works for different skin tones.
Trending Summer Nail Colors 2025
Coral and Warm Orange Tones
Coral nails are the quintessential summer color — they bridge the gap between pink and orange, complement every skin tone beautifully, and photograph magnificently in bright summer light. In 2025, the most popular coral shades lean slightly toward warm, terracotta-influenced tones rather than the neon coral of previous years. Try OPI’s “Cajun Shrimp,” Essie’s “Tart Deco,” or Sally Hansen’s “Coral Reef” for beautiful, wearable coral options.
Bright Cherry Red
Red nails never go out of style, but summer 2025 is specifically obsessing over bright, warm cherry red — not dark burgundy, not blue-toned red, but a vibrant, classic, Marilyn Monroe-esque true red. This shade works on every skin tone, looks incredible with a summer tan, and reads as effortlessly glamorous. Essie’s “Really Red,” OPI’s “Big Apple Red,” and Zoya’s “Remy” are the most beloved options.
Butter Yellow
Soft, creamy butter yellow is one of the biggest nail color trends of summer 2025. It is cheerful without being aggressive, pairs beautifully with summer tans and warm skin tones, and photographs in a genuinely beautiful way. This shade works best in a creamy, slightly muted finish rather than neon yellow. Try Olive & June’s “Butter,” Essie’s “Daffodil,” or Sally Hansen’s “Sun Kissed.”
Neon Brights
Neon nail colors — electric pink, lime green, vivid orange, hot coral — are having a major summer 2025 moment. These high-pigment, luminous colors look electric in sunlight and create the kind of bold, statement-making manicure that turns heads at the beach and pool. The key is choosing high-quality neon polish with strong pigmentation — cheap neon polishes often look streaky and require too many coats. OPI Neon Collection, Orly Neon, and Cirque Colors Neon Collection are all excellent choices.
Aqua and Turquoise Blue
Ocean-inspired blue-green tones — aqua, turquoise, seafoam — are perfect summer nail colors that directly reference beach and water aesthetics. These shades are particularly striking on medium and deeper skin tones. Essie’s “Turquoise & Caicos,” OPI’s “Can’t Find My Czechbook,” and China Glaze’s “For Audrey” (a popular dupe for Tiffany blue) are perennial summer favorites.
Clean White and Off-White
White nails have been a summer staple for years — but 2025 is specifically trending toward warm off-white and milky white rather than stark bright white. A creamy, slightly warm white looks more sophisticated and less harsh than pure white, while still delivering that clean, fresh summer aesthetic. Essie’s “Blanc,” OPI’s “Alpine Snow,” and Zoya’s “Purity” are beautiful options.
Soft Lilac and Lavender
Lavender and soft purple tones are having a significant moment in summer nail trends for 2025, reflecting the broader purple aesthetic trend across fashion and beauty. These shades work beautifully as a sophisticated alternative to typical summer brights. Try Essie’s “Perennial Chic,” OPI’s “Do You Lilac It?,” or Sally Hansen’s “Violet Voltage.”
Summer Nail Colors by Skin Tone
Choosing colors that complement your specific skin tone makes a genuinely significant difference in how your nails look:
| Skin Tone | Best Summer Colors | Colors to Approach Carefully |
|---|---|---|
| Fair/Light | Coral, soft pink, lavender, peach, butter yellow | Very pale nude (can wash out) |
| Light-Medium | Almost anything — bright red, coral, turquoise, hot pink | N/A — very versatile range |
| Medium/Olive | Deep coral, terracotta, bright orange, gold, teal | Very pale pink (can look washed out) |
| Medium-Deep | Rich coral, bright red, turquoise, electric blue, neon | Very light nude/beige |
| Deep/Rich | Bright neon, deep red, bright white, royal blue, hot pink | Very dark shades that can visually disappear |
Summer Nail Art Ideas You Can Actually Do at Home
Nail art no longer requires professional training or specialized equipment. These designs are achievable at home with basic tools and a little practice:
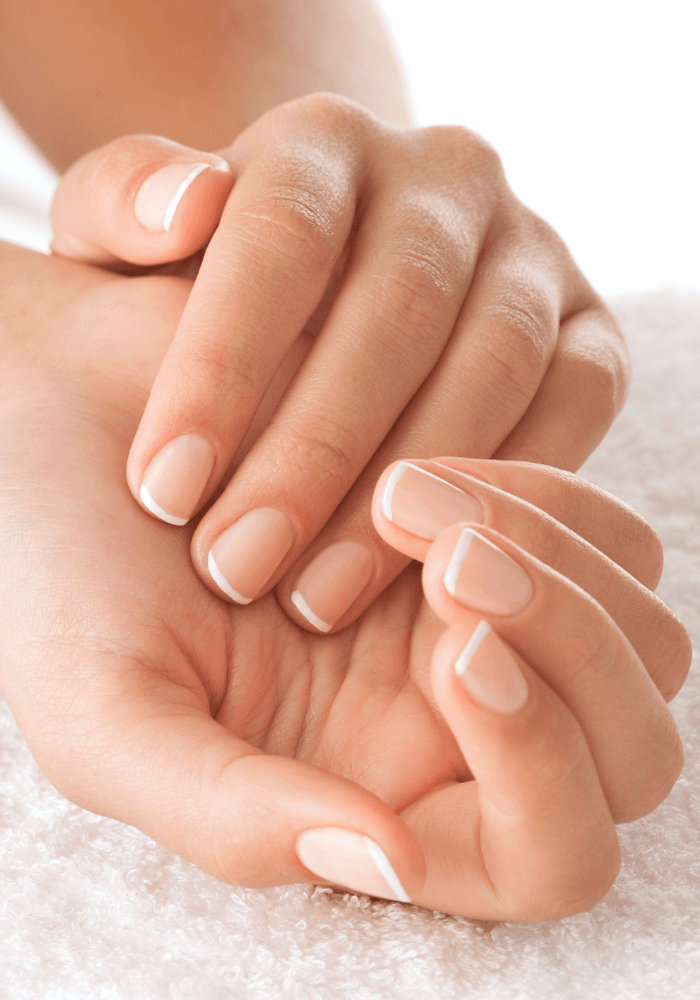
French Manicure — The Classic Reinvented
The traditional French manicure (natural base, white tip) has been completely reinvented for summer 2025. The most popular modern versions include:
Colored French tips: Instead of white, use coral, turquoise, butter yellow, or even neon pink for the tip. The base can be nude, clear, or a complementary soft color.
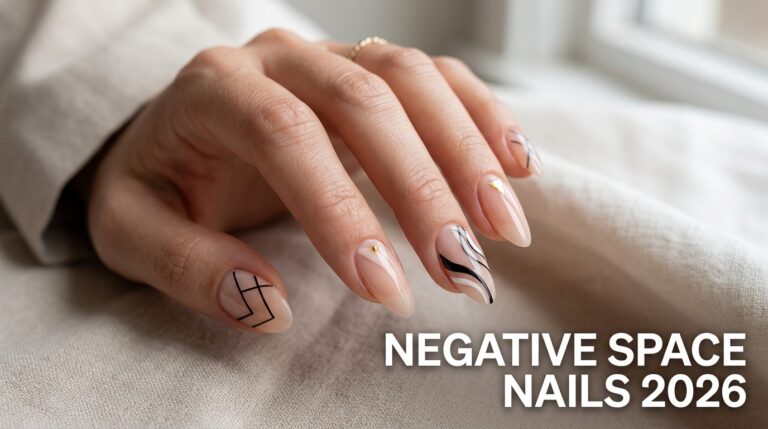
Negative space French: Leave a strip of bare nail at the tip rather than adding a white tip — creating a clean, modern inverse French look.
Chunky French: A thicker, more exaggerated white or colored tip — less precise than traditional French, more fashion-forward and bold.
How to create a French tip at home: Apply your base and base coat. Then use French tip nail guides (small adhesive stickers that create the curved tip line — available on Amazon for $3–$6) to mask the lower nail. Paint your chosen tip color over the guide sticker. Remove the sticker while the polish is still slightly wet for the cleanest edge.
Summer Floral Nail Art
Floral nail art ranges from simple dot-based flowers achievable with a toothpick to elaborate detailed designs. The most beginner-friendly summer floral technique uses:
Dotting tool flowers (or bobby pin/toothpick substitute):
- Apply your base color and allow to dry completely
- Dip a dotting tool, the end of a bobby pin, or a toothpick into white or contrasting polish
- Create five dots in a circular pattern (each dot is a petal)
- Add a smaller dot of yellow or contrasting color in the center of the flower
- Allow to dry for 2–3 minutes and seal with top coat
This simple technique creates genuinely charming floral nail art that reads as sophisticated and intentional in photos.
Negative Space Nail Art
Negative space designs use your bare nail as part of the design — leaving strategic sections unpainted to create geometric patterns, lines, and shapes.
Easy negative space technique:
- Apply a clear base coat
- Use small strips of regular scotch tape cut to the desired shape to mask sections of the nail
- Paint over the tape with your chosen color
- Remove tape while polish is still wet
- Seal with top coat
This creates clean geometric lines, triangles, diagonal stripes, and moon shapes with zero artistic skill required — just tape placement.
Ombre and Gradient Nails
Ombre nails blend two colors seamlessly from one shade to another across the nail. The sponge technique makes this achievable at home:
- Apply your lighter base color across the entire nail and allow to dry
- Apply both colors to a small makeup sponge in overlapping bands
- Dab the sponge onto the nail repeatedly with light pressure until the gradient appears
- Use cotton and acetone to clean the skin around the nail (the sponge method gets messy)
- Apply two thin layers of top coat to smooth the texture
Color Block Nails
Color blocking — geometric sections of two or three contrasting colors on a single nail — is one of the boldest and most graphic summer nail trends. Use tape to create clean dividing lines between colors. Try coral and white, turquoise and yellow, or neon pink and black for dramatic summer statements.
How to Make Your Summer Nail Polish Last Longer
Getting your manicure to last through summer’s harsh conditions — pool chlorine, saltwater, sunscreen, frequent washing, and heat — requires specific strategies beyond just good initial application.
The Two-Day Top Coat Refresh
The single most effective manicure-extending technique is applying a fresh thin layer of top coat every two to three days. This reseals the polish edges, replaces shine lost to washing and UV exposure, and dramatically delays chipping. Set a reminder on your phone every other day for the first week of a new manicure. This takes literally two minutes and can extend a manicure that would last five days to lasting ten to fourteen days.
Wear Gloves for Household Tasks
Cleaning products, dishwashing, and scrubbing are the fastest ways to destroy a summer manicure. Keep a pair of rubber gloves at the kitchen sink and use them for any task involving soaking or cleaning products. This single habit extends manicure life more than any polish product change.
Apply Cuticle Oil Daily
Dry cuticles and dry nails are more prone to peeling and chipping. Daily cuticle oil application keeps the nail flexible and prevents the brittleness that leads to breakage and polish lifting. Apply one drop to each cuticle every night before bed — it takes 30 seconds and the results for nail health are significant.
Avoid Using Your Nails as Tools
Using fingernails to open cans, pull apart packages, scratch off stickers, or pry things open is the most direct path to broken nails and chipped polish. Develop the habit of using fingertip pads rather than nail tips for these tasks — it sounds trivial but makes a real difference in how long both your polish and your natural nails survive summer activity.
Cap the Edges Every Application
As mentioned in the application steps — capping the free edge of the nail with every coat of base, color, and top coat is the most structurally important technique for chip prevention. The tip of the nail takes the most physical abuse throughout the day — capping seals and reinforces this vulnerable area.
Keep Nails Hydrated
Well-hydrated nails are stronger and more flexible — they bend slightly under pressure rather than snapping or chipping. Drink adequate water (the classic summer health advice that happens to be genuinely relevant for nail health), apply hand cream regularly, and use cuticle oil daily. Nails that are brittle and dry from summer sun and swimming pool exposure are far more prone to breakage and polish failure.
Gel Nails at Home — Is It Worth It?
The home gel nail market has exploded in recent years, and for summer specifically — when you want long-lasting, chip-resistant nails — gel is an attractive option worth understanding.
What You Need for At-Home Gel Nails
- LED or UV nail lamp: A UV or LED lamp cures (hardens) gel polish. LED lamps are faster and more energy-efficient. Good quality options from MelodySusie, MZBAUER, or Beetles are available on Amazon for $15–$35.
- Gel base coat, gel color polish, and gel top coat: All three must be specific gel formulas — regular polish does not cure under a lamp. Beetles, Modelones, and Gel X are popular affordable gel polish brands.
- Gel cleanser or 91% isopropyl alcohol: For wiping the tacky inhibition layer after curing.
- Gel remover or pure acetone: Gel requires soaking in pure acetone for 10–15 minutes with the foil wrap method to remove properly.
The At-Home Gel Process
The process follows the same structure as regular polish — prep, base coat, color coats, top coat — but with a UV/LED lamp cure between each layer (typically 30–60 seconds per layer depending on the lamp and brand). The result is a genuinely hard, chip-resistant finish that lasts 2–3 weeks with proper application and maintenance.
Gel-Polish Hybrid Options
If you want gel-like durability without committing to a lamp, gel-effect or hybrid polishes offer a middle ground. Sally Hansen Miracle Gel, Essie Gel Couture, and OPI Infinite Shine are all regular-polish formulas that apply without a lamp but deliver significantly better durability and shine than standard nail polish. These are excellent summer options for people who want longevity without the full gel system investment.
Common Nail Mistakes That Ruin Summer Manicures
Mistake 1 — Skipping the Dehydration Step Before Base Coat
Wiping nails with alcohol or acetone before applying base coat is the most skipped and most important prep step in home manicures. Natural nail oils prevent polish adhesion at a chemical level — no matter how well you apply your base coat, it will not bond properly to an oily nail surface. Dedicate 30 seconds to wiping each nail with an alcohol-dampened pad immediately before base coat and your manicure longevity will increase dramatically.
Mistake 2 — Applying Polish Coats That Are Too Thick
Thick coats of polish seem like they would cover faster and better — and they do cover faster in the moment. But thick coats dry slowly, wrinkle as they dry, never cure completely hard, and chip far more easily than thin coats. Two thin coats always outperform one thick coat in terms of appearance, durability, and overall finish quality.
Mistake 3 — Not Waiting Long Enough Between Coats
Applying the second coat before the first has fully dried traps solvents beneath the surface, creates bubbles, and causes wrinkling and uneven texture. Each coat needs a genuine 2–3 minutes of drying time before the next is applied. This patience pays off in a dramatically smoother, more professional final result.
Mistake 4 — Touching the Cuticle Area With Polish
Polish that touches the skin around the nail does not just look messy it actually lifts from the edge inward as it dries, pulling the entire manicure away from the nail surface and causing premature peeling. Always leave a 1–2mm gap between your polish application and the cuticle skin. This gap looks professional, prevents lifting, and makes cleanup unnecessary on well-applied nails.
Mistake 5 — Shaking the Polish Bottle
Shaking nail polish introduces air bubbles into the formula, which translate directly to bubbles on your nail surface. Roll the bottle between your palms instead this mixes the pigment without introducing air. If you consistently see bubbles in your finished manicure, shaking the bottle is almost certainly the cause.
Mistake 6 — Skipping Top Coat or Using an Old Top Coat
Top coat that has thickened with age (old, clumpy, or stringy) does more harm than good it drags color out of place, applies unevenly, and creates a bumpy rather than smooth finish. Nail polish thinners ($5–$8 on Amazon) can restore an old top coat to workable consistency, or simply replace it. Top coat is the most important product in your manicure kit invest in a quality option and replace it when it starts to thicken.
Mistake 7 — Doing Any Activity Too Soon After Finishing
Nails feel dry within 10–15 minutes of applying top coat, but they are not actually hard for 1–2 hours. Doing dishes, typing intensively, opening cans, or applying lotion within this window dents and smudges what appears to be a dry manicure. Give freshly painted nails at least one hour of minimal hand activity do them before a period of relative rest (evening TV time, reading, sleeping) for the best results.
Summer Nail Care — Keeping Natural Nails Healthy All Season
Beyond the manicure itself, summer presents specific nail health challenges that require ongoing care attention.
Protecting Nails From Chlorine and Saltwater
Pool chlorine and ocean saltwater both dry nails significantly, causing brittleness, peeling, and dramatically shortened manicure life. Apply a thin coat of clear nail polish or a dedicated nail hardener before swimming to create a protective barrier. After swimming, rinse hands thoroughly with fresh water and apply cuticle oil immediately. These two steps — the pre-swim barrier and the post-swim hydration — make a significant difference in nail health throughout a summer of regular swimming.
Sun Protection for Nails
UV exposure fades nail polish color (particularly bright summer shades) and can cause the nail plate itself to become more brittle over time. While applying SPF sunscreen to your hands for skin protection, extend the application to your nail area as well. Some base coats include UV filters — look for this feature if sun-fading of polish is a concern.
Nail-Strengthening Treatments for Summer
If your nails are prone to breaking, peeling, or splitting — issues that summer heat and water exposure intensify — a nail-strengthening treatment used between manicures helps build nail resilience over time. OPI Nail Envy, Sally Hansen Hard as Nails, and Zoya Naked Manicure Base are all effective strengthening treatments available at Ulta, Target, and Amazon in the $8–$15 range.
Taking Breaks Between Manicures
Even with the best home gel or regular polish technique, nails benefit from occasional breaks where they are left completely bare and treated with strengthening and hydrating products. A one-week bare nail period every six to eight weeks — during which you apply cuticle oil nightly and a nail hardener every few days — allows nails to breathe, rebuild, and emerge stronger for the next manicure cycle.
Key Takeaways
- Nail preparation is more important than technique — clean, dehydrated, properly shaped nails with pushed-back cuticles are the foundation of every professional-looking summer manicure
- The dehydration step (wiping nails with alcohol or acetone before base coat) is the most commonly skipped and most impactful step for manicure longevity
- Thin coats always beat thick coats — two thin coats of color polish dry harder, look smoother, and last significantly longer than one thick coat
- Capping the free edge of every layer (base coat, color, top coat) is the single most important technique for preventing tip chipping
- Top coat reapplication every 2–3 days is the easiest and most effective way to extend a summer manicure from 5 days to 10–14 days
- The best summer nail colors for 2025 include coral, cherry red, butter yellow, aqua blue, neon brights, clean white, and soft lavender
- Cuticle oil applied nightly is the most underused and most impactful nail health habit for summer nail maintenance
- Gel-effect hybrid polishes (Sally Hansen Miracle Gel, Essie Gel Couture, OPI Infinite Shine) offer significantly better longevity than standard polish without requiring a UV lamp investment
FAQs
How long does a home summer manicure last?
A properly applied home manicure using quality products and correct technique typically lasts 7–10 days for regular polish and 14–21 days for gel polish. The key factors affecting longevity are nail preparation (especially the dehydration step), thin coat application, capping the free edge, and top coat reapplication every 2–3 days. Most home manicures that chip early do so because of missing preparation steps or thick polish coats — not because of the quality of the polish itself. With full attention to technique, a home manicure can genuinely outlast a rushed salon appointment.
What is the best nail polish brand for summer nails at home?
Several brands consistently deliver the best results for home summer manicures at different price points. OPI offers the most consistent pigmentation, wide color range, and professional-quality longevity — their Infinite Shine line is particularly excellent. Essie is beloved for its enormous color range, beautiful summer shades, and reliable quality. Sally Hansen offers the best value for budget-conscious manicurists. Zoya is the most recommended for nail health — it is free of the most harmful chemicals (toluene, formaldehyde, DBP, camphor, and formaldehyde resin). For gel systems at home, Beetles and Modelones offer excellent quality at very accessible price points on Amazon.
How do I stop my nail polish from bubbling?
Nail polish bubbles are caused by three main factors: shaking the bottle (roll it instead), applying coats that are too thick, and applying polish in a room that is too hot or too cold. The solution: Roll your polish bottle between your palms for 10 seconds rather than shaking it. Apply thin coats with patience between layers. Work in a room-temperature environment — not in direct sunlight or near air conditioning vents. If you consistently see bubbles in your finished manicure, try changing these three variables one at a time to identify which is causing the issue. Old, thickened polish also bubbles — add two drops of nail polish thinner (not acetone — actual thinner like OPI Nail Lacquer Thinner) to restore smooth consistency.
Can I do gel nails at home without going to a salon?
Yes — home gel nail systems have become genuinely accessible and high-quality. You need a UV or LED nail lamp ($15–$35 on Amazon), gel base coat, gel color polishes, and a gel top coat — all from the same brand for best results. Brands like Beetles, Modelones, and Gel X have made professional-quality gel systems available for under $30 for a complete starter kit. The technique is nearly identical to regular polish (thin coats, cap the free edge) with the addition of a 30–60 second cure under the lamp between each layer. The result is a genuinely chip-resistant, long-lasting manicure that rivals salon gel quality when applied correctly.
What summer nail art can beginners do at home?
The most beginner-friendly summer nail art techniques include: dotting tool flowers (use a toothpick or bobby pin as a free substitute), tape-guided geometric designs (tape creates clean straight lines for color blocking and negative space), sponge ombre gradients (a makeup sponge blends colors together on the nail), and colored French tips using nail guides (adhesive sticker guides create perfect tip lines without freehand skill). All of these techniques require zero artistic training — they rely on simple tools and basic technique rather than precision painting ability. Start with one technique, practice it on a few nails before committing to a full manicure, and your confidence and skill will build quickly.
How do I fix a smudged nail without starting over?
Fix a smudged nail without completely restarting using the lick-and-smooth technique — lightly lick your fingertip and press it gently against the smudged area. The slight moisture from saliva actually smooths wet or semi-dry polish back into place surprisingly effectively. For a more reliable fix, dip your finger tip in a tiny amount of polish remover and very gently smooth the smudge. Then allow the area to dry completely before adding a new thin layer of color over just the affected nail. Finish with a fresh coat of top coat across the entire nail to blend the repair seamlessly. For a smudge caught immediately while completely wet, simply reshape the polish before it dries further.
How do I remove gel nail polish at home safely?
Removing gel nail polish at home safely requires the foil soak method — never peel or scrape gel off, as this removes layers of the natural nail plate and causes significant damage. File the shiny top coat surface of each nail gently with the rough side of a nail file to break the seal. Soak a small piece of cotton in pure acetone (not regular nail polish remover — it must be pure acetone), press it against the nail, and wrap the finger in a small square of aluminum foil. Leave wrapped for 10–15 minutes. The gel will have loosened and can be gently pushed off with an orange wood stick. Apply generous cuticle oil to every nail immediately after removal to restore moisture lost during the acetone process.
What nail shapes are best for short nails in summer?
For short nails, rounded and squoval shapes are the most flattering because they create the illusion of slightly longer, more elegant fingers without requiring significant nail length. The oval shape is also beautiful on short nails — it elongates the finger visually more than a square or flat shape. Avoid very dramatic shapes like coffin or stiletto on short nails — they require significant length to look intentional rather than awkward. For color choices on short nails, bright, warm colors, French tips in contrasting colors, and clean white or nude all photograph beautifully and make short nails look polished and intentional rather than unfinished.
Conclusion
Getting perfect summer nails at home is genuinely achievable for anyone who is willing to follow the right steps in the right order with the right tools. The difference between a salon-quality home manicure and a disappointing one comes down to preparation, patience, and technique — not talent, expensive products, or professional training.
Start with completely clean, dehydrated nails. Shape them intentionally for your finger shape and lifestyle. Push back your cuticles properly. Apply thin layers with patience between each one. Cap every single free edge. Choose a top coat you love and reapply it regularly. Keep your cuticles hydrated every single day. These simple, consistent habits create beautiful nails that last through every summer adventure.
The best summer nails you have ever had are waiting for you in your own home with the right technique, your own manicures will start looking better than your salon ones, cost a fraction of the price, and last just as long or longer.
Start today with whatever products you already have. Practice the technique. Build your kit gradually. And enjoy the confidence of perfectly polished summer nails every single day of the season.